Parts specify the material requirements for a work order repair.
On the Parts tab, you can issue the parts required for the repair, edit details of an issued part, return issued parts to vendor or inventory, and issue parts from the parts list associated with a repair.
This topic describes the following:
You can issue an asset part that is present in FASTER Web to a work order.
1. On the Maintenance module, search and view the work order.
2. Click the Parts tab.
The Parts List page opens.
3. Click the Issue Part link.
The Issue a Part dialog box opens.
4. In the Enter FASTER Item Number or Vendor Item Number box, type the item number or the vendor item number that you want to issue for the repair.
You can use a barcode scanner to enter the Item Number, if available.
5. In the Storeroom list, select the storeroom assigned to the part.
6. Click Continue.
7. One of the following occurs:
o If the item exists in the storeroom, the Issue a Part dialog box opens. Continue with Step 8.
o If the item does not exists in FASTER Web, the Issue a Part dialog box opens allowing you to add a new part in FASTER Web. For more information, refer to Issuing a Non-Stock Part to a Work Order.
8. In the Issue Quantity box, type the number of parts you want to issue.
|
Note: In the Issue Quantity box, you can specify a value less than or equal to the quantity of parts available in the Available Quantity field. |
9. The Issue Date field displays the current date and time. Optionally, type the date and time in the MM/DD/YYYY HH:MM:SS AM/PM format, or select the date from the calendar and time from the clock.
10. In the Select the repair that applies to this issue field, select a repair for which you want to issue the part.
11. Optionally, click the Add a New Repair link to add a repair to the work order. For details, see Repairs Tab.
|
Note: You must first add a repair to the work order to issue parts from the Parts tab. |
12. The Maintenance Shop list displays the default maintenance shop that was selected while creating the work order. Optionally, select a different maintenance shop.
13. In the Technician list, select the technician who has requested to issue a part for the repair.
14. When finished, click one of the following:
o Issue Part to save the information and close the dialog box.
o Save & Issue Another Part to save the information and issue another part.
o Cancel to disregard any changes and close the dialog box.
|
Note: While creating work order for a maintenance shop, if the Approved Above Threshold check box is not selected and if the total cost of work order including part cost exceeds the threshold amount specified for that maintenance shop in Setup, an Authorization Required dialog box is displayed. You can click:
|
You can also issue a part that is currently not present in FASTER Web to a work order.
1. On the Maintenance module, search and view the work order.
2. Click the Parts tab.
The Parts List page opens.
3. Click the Issue Part link.
The Issue a Part dialog box opens.
4. In the Enter FASTER Item Number or Vendor Item Number box, type the part number or the vendor part number that you want to issue for the repair.
5. In the Storeroom list, select a storeroom.
6. If the part number is not verified as a FASTER Web part, the Issue a Part dialog box opens allowing you to add the details of the new part in FASTER Web.
7. In the Issue a Part dialog box, perform the following:
a. In the Vendor Name list, select a vendor for the part.
b. In the Invoice Number box, type the invoice number to receive the part.
c. Click the Verify link to verify if the invoice number exists for the selected vendor.
d. In the Invoice Date field, type the date of invoice in the MM/DD/YYYY HH:MM:SS AM/PM format, or select the date from the calendar.
e. In the Ship to Location list, select a location to ship the part.
f. In the Tax Code list, select a tax type.
The amount of tax charged on the part is based on the selected tax type.
|
Note: If a default payment type is set for the vendor from Vendor Settings in the Setup module, the Payment Type and its related fields pre-populate with details. But if the default purchase order or credit card set for the vendor is expired, the purchase order or the credit card details do not pre-populate. Also, if a default payment type is not set for the vendor, the Payment Type list displays Existing Purchase Order by default. |
g. In the Payment Type list, select a mode of payment to pay for the part.
h. In the Invoice Total box, type the total amount of invoice.
i. Based on the selected payment type, perform one of the following:
§ If the payment type is Existing Purchase Order, perform the following:
(i) In the Purchase Order Number list, select the vendor's existing purchase order.
|
Note: The Purchase Order Number list does not display the purchase orders with a future start date. |
(ii) In the Budget Line Item Account Number list, select an account number for the purchase order.
§ If the payment type is New Purchase Order, perform the following:
(i) In the Purchase Order Number box, type a new purchase order number.
(ii) In the Budget Line Item Account Number list, select an account number for the purchase order.
|
Note:
However, you can make changes to the selected options, as required. |
(iii) In the Funded Amount box, type the total amount funded for the purchase order.
(iv) In the Max Purchase Limit box, type the maximum amount that you can use for each transaction.
(v) In the Effective End Date field, type an end date for the purchase order in the MM/DD/YYYY format or select a date from the calendar.
§ If the payment type is Credit Card, perform the following:
(i) In the Card Type list, select the type of the card.
(ii) In the Last 4 digits box, type the last four digits of the credit card.
(iii) In the Cardholder's Name box, type the name of the cardholder.
(iv) Click Verify to validate the credit card details.
(v) In the Budget Line Item Account Number list, select an account number for the credit card.
j. In the Received Qty box, type the quantity of the part received.
k. In the Unit Price box, type the price of the part.
|
Note: The Extended box displays the total price of the part. |
l. In the Shipping box, type the shipping cost of the part.
m. In the Tax box, type the amount of tax to be charged on the part.
n. In the Other Charge Type list, select the other charges to be applied on the part.
o. In the Unit Price box, type the price of the other charge type.
|
Note: · The UM box displays the unit of measurement assigned to the part by default. · The Extended box displays the total cost of other charges applied on the part. |
p. In the Tax box, type the amount of tax to be charged on other charges.
q. The Part Number box displays the part number. Optionally, type a different part number.
r. The Storeroom list displays the part storeroom. Optionally, select a different part storeroom.
s. In the Part Name box, type the part name.
t. In the Part Type list, select the part type.
u. In the Part Category list, select a category of the part.
v. In the Warranty Length and Cycle fields, type and select the length and duration of the warranty, respectively.
You can add the date warranty and the meter warranty.
|
Note: Warranty cycle is based on the warranty length selected. For example, to set a warranty period of 1 year, type 1 in the Warranty Length box and select year in the Warranty Cycle list. |
w. Click one of the following:
§ Add Non-stock Part & Continue to add the part record and move to the next step.
§ Cancel to disregard any changes and close the dialog box.
8. In the Issue Quantity box, type the number of parts you want to issue to the work order.
|
Note: In the Issue Quantity box, you can specify a value less than or equal to the quantity of parts available in the Available Quantity field. |
9. The Issue Date field displays the current date and time. Optionally, type the date and time in the MM/DD/YYYY HH:MM:SS AM/PM format, or select the date from the calendar and time from the clock.
10. In the Select the repair that applies to this issue field, select a repair for which you want to issue the part.
|
Note: Optionally you can click the Add a New Repair link to add a new repair to the work order. You must first add a repair to the work order to issue parts from the Parts tab. |
11. The Maintenance Shop list displays the default maintenance shop that was selected while creating the work order. Optionally, select a different maintenance shop.
12. In the Technician list, select the technician who has requested to issue a part for the repair.
13. Click one of the following:
o Issue Part to save the information and close the dialog box.
o Save & Issue Another Part to save the information and issue another part.
o Cancel to disregard any changes and close the dialog box.
|
Note: While creating work order for a maintenance shop, if the Approved Above Threshold check box is not selected and if the total cost of work order including part cost exceeds the threshold amount specified for that maintenance shop in Setup, an Authorization Required dialog box is displayed. You can click:
|
You can edit a part issued to modify or update the part details.
1. On the Maintenance module, search and view the work order.
2. Click the Parts tab.
The Parts List page opens.
3. Click ![]() next to the part you want to edit.
next to the part you want to edit.
4. Click the Edit link.
5. In the Edit Part Issue dialog box, make the changes as desired.
6. When finished, click one of the following:
o Save to save the information and close the dialog box.
o Cancel to disregard any changes and close the dialog box.
A part issued for a repair can be returned to a vendor if the part is no longer required for the repair.
1. On the Maintenance module, search and view the work order.
2. Click the Parts tab.
The Parts List page opens.
3. Click ![]() next to the part you want to edit.
next to the part you want to edit.
4. Click the Edit link.
5. In the Edit Part Issue dialog box, click the Return to Vendor link.
The Return Part Issue to Vendor dialog box opens.
6. The Vendor Name list displays the default vendor of the part. Optionally,select a different vendor.
7. In the Return Quantity box, type the quantity of parts issued for the repair.
The return quantity must not be greater than the net issued quantity.
8. The Date Returned field displays the current date and time. Optionally, type the date and time in the MM/DD/YYYY HH:MM:SS AM/PM format, or select the date from the calendar and time from the clock.
9. In the Reason for Return list, select a reason to return the part to the vendor.
10. In the Status of Return list, select the status of the part return.
11. The Date Shipped field displays the current date and time. Optionally, type the date and time in the MM/DD/YYYY HH:MM:SS AM/PM format, or select the date from the calendar and time from the clock.
12. Optionally, in the Vendor Part Number list, select the vendor part number.
13. Optionally, in the RGA/RMA Number box, type the Return Goods Authorization (RMA) number or Return Merchandise Authorization number (RGA) number.
RGA or RMA is the number used to return a part to receive refund or replacement during the part's warranty period.
14. Optionally, in the Original Invoice Number box, type the invoice number.
15. When finished, click one of the following:
o Save to save the information and close the dialog box.
o Cancel to disregard any changes and close the dialog box.
A part issued for a repair can be returned to the inventory if the part is no longer required for the repair.
1. On the Maintenance module, search and view the work order.
2. Click the Parts tab.
The Parts List page opens.
3. Click ![]() next to the part you want to edit.
next to the part you want to edit.
4. Click the Edit link.
5. In the Edit Part Issue dialog box, click the Return to Inventory link.
The Return Part Issue to Inventory dialog box opens.
6. In the Return Quantity box, type the quantity of parts issued for the repair.
The return quantity must not be greater than the net issued quantity.
7. The Date Returned field displays the current date and time. Optionally, type the date and time in the MM/DD/YYYY HH:MM:SS AM/PM format, or select the date from the calendar and time from the clock.
8. When finished, click one of the following:
o Save to save the information and close the dialog box.
o Cancel to disregard any changes and close the dialog box.
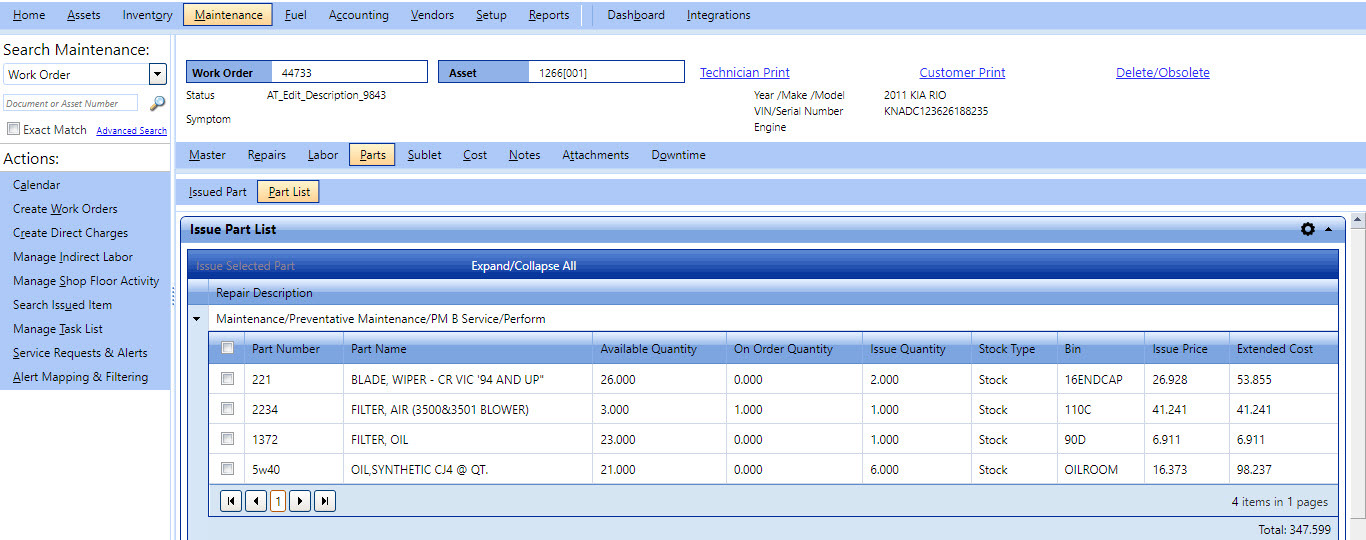
The Part List tab displays the asset parts that are associated with the repairs added to the work order.
You can associate certain parts with a specific asset type, repair type and organization in the Manage Part List section. When a work order is created for the similar asset type, repair type and organization, the Part List displays the associated asset parts. You can select and issue the desired parts to complete the repair.
 Tip
Tip
To view the Part List tab, click the Part List link.
1. On the Maintenance module, search and view the work order.
2. Click the Parts > Part List tab.
The Issue Part List page opens displaying the parts associated with the repair.
3. Select a part, type the required quantity in the Issue Quantity column, and click the Issue Selected Part link to issue the selected part for repair.