Adding a New Repair upon SIGN IN
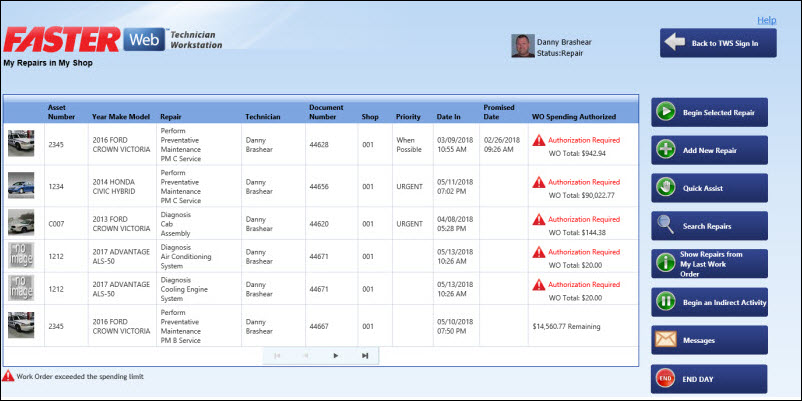
On the My Repairs in My Shop page, You can add new repairs.
 Tip
Tip
To view the My Repairs in My Shop page, click the My Repairs in My Shop link.
To Add a new repair upon Sign In
- Sign In to TWS.
The My Repairs in My Shop screen opens.
|
Note: The WO Spending Authorized column displays the status of the repair with respect to the spending limit set for that work order:
You can work on the repair of the work order that has not exceeded spending limit.
|
- Click the Add New Repair button to the right of the screen.
The Add Repair: Select Work Order screen opens.
|
Note:
- When you add a repair, the system will add Time Standard and Hours for the repair. The Time Standard consists of the following.
- Labor Standard : The typical amount of time in which the repair of a particular class of the assets should be completed.
- Average Labor Time : The time calculated as per the grouping of the repairs of the assets such as Class or Year, Make or Model.
- If single Labor Standard is set for the repair, then the Time Standard is set to Labor Standard and the Labor Standard Hours value will be used.
- If multiple Labor Standards are set for the repair, then the Time Standard is set to Labor Standard and the Labor Standard Hours value will be null.
- If the Labor Standard is not set for the repair, the system will check if Average Labor Time setting is enabled and calculate the average time. If the Labor Standard is not set, and Average Labor Time is disabled, then the Time Standard and Hours are set to null.
- At any time during this process, you can cancel by clicking the Cancel Add Repair to the right of the screen.
|
- Select the appropriate Work Order, and then click the Continue button to the right of the screen.
- To narrow the Work Order list, click the Search by Asset Number or License or the Filter List by Work Order Shop button.
- To page through the list, use the arrows at the bottom of the screen.
The Add Repair: Select Repair Category screen opens.
Tip: If you are having difficulty selecting an asset on the screen, try clicking anywhere in the asset selection area except directly on an to select the entry.
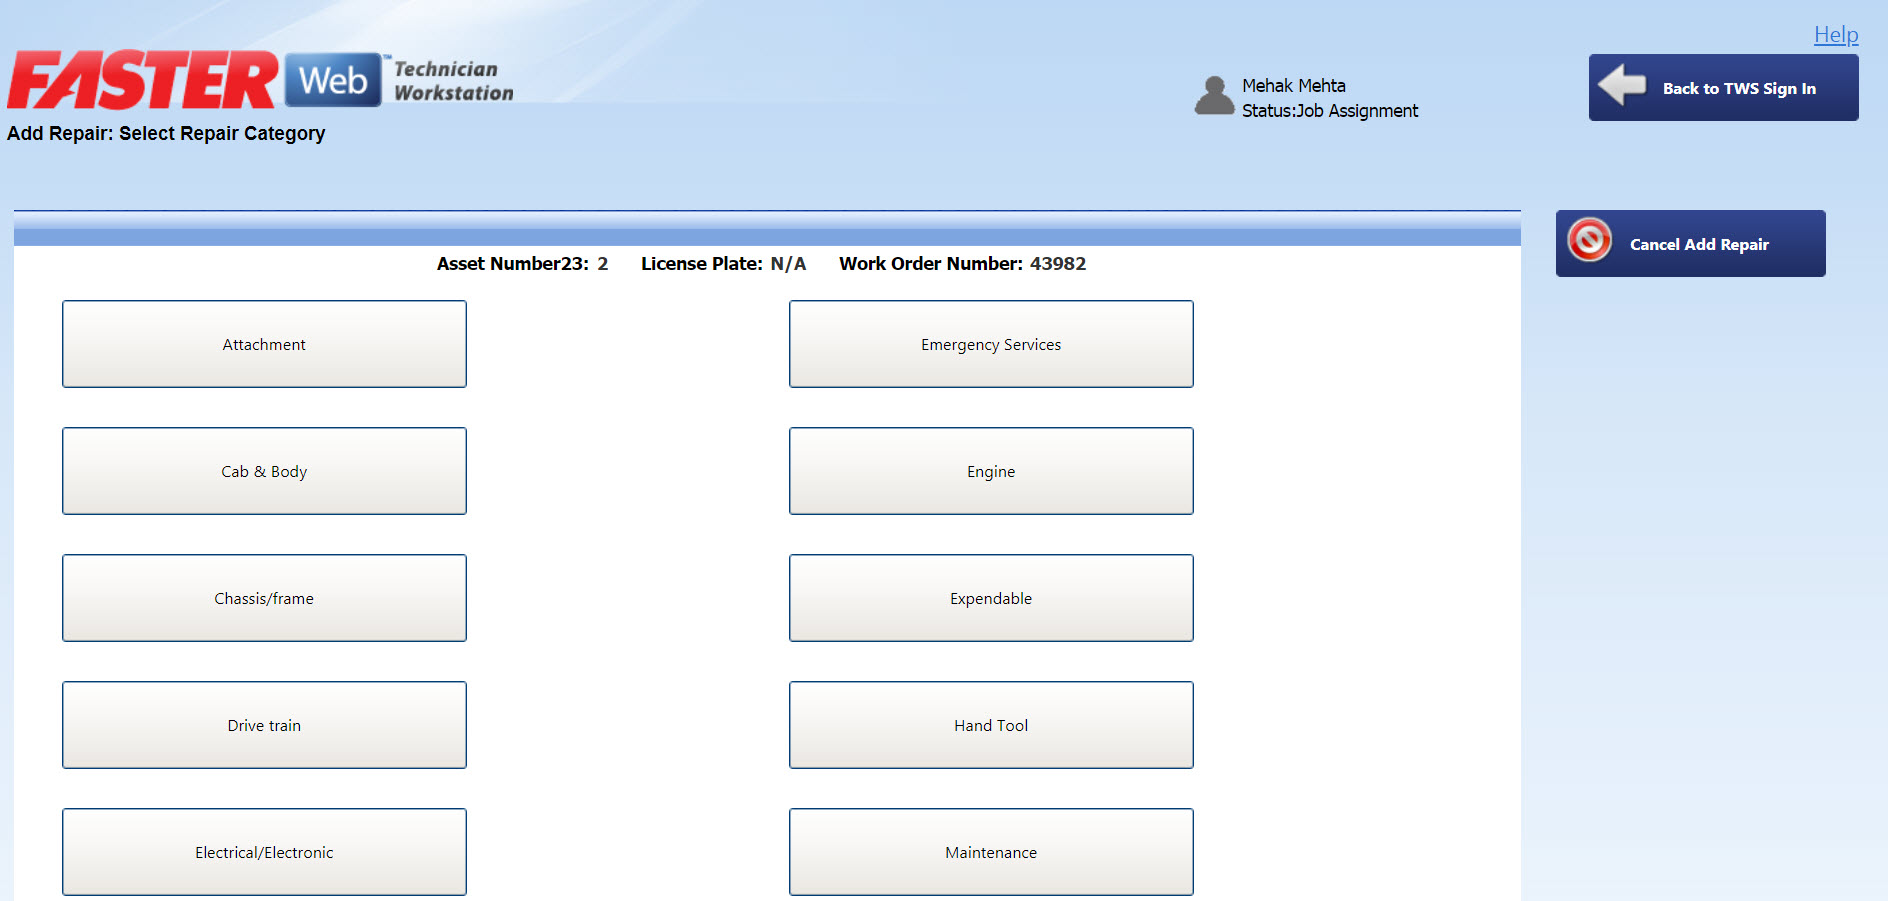
Add Repair: Select Repair Category
- Click Repair Category of the repair that you want to add.
Note: Your system administrator can manage the Categories in Setup > Maintenance > Repair codes > TWS Repair Categories.
- In the new window, select the Repair Item and Reason.
- Alternatively, click the Select Another Category button on the right to go back to the category screen.
- To page through the list, use the arrows at the bottom of the screen.
- Depending on the Repair Item selected, the Add Repair dialog box opens.
|
Note:
- When you add a repair, the system will add Time Standard and Hours for the repair. The Time Standard consists of the following.
- Labor Standard : The typical amount of time in which the repair of a particular class of the assets should be completed.
- Average Labor Time : The time calculated as per the grouping of the repairs of the assets such as Class or Year, Make or Model.
- If single Labor Standard is set for the repair, then the Time Standard is set to Labor Standard and the Labor Standard Hours value will be used.
- If multiple Labor Standards are set for the repair , then the Time Standard is set to Labor Standard and the Labor Standard Hours value will be null.
- If the Labor Standard is not set for the repair, the system will check if Average Labor Time setting is enabled and calculate the average time. If the Labor Standard is not set, and Average Labor Time is disabled, then the Time Standard and Hours are set to null.
|
- Select the appropriate information or click the Back- Change Action or Back- Change Component button.
- Continue until you reach the Add Repair - Final Step: Verify selected repair and choose add or begin repair screen.
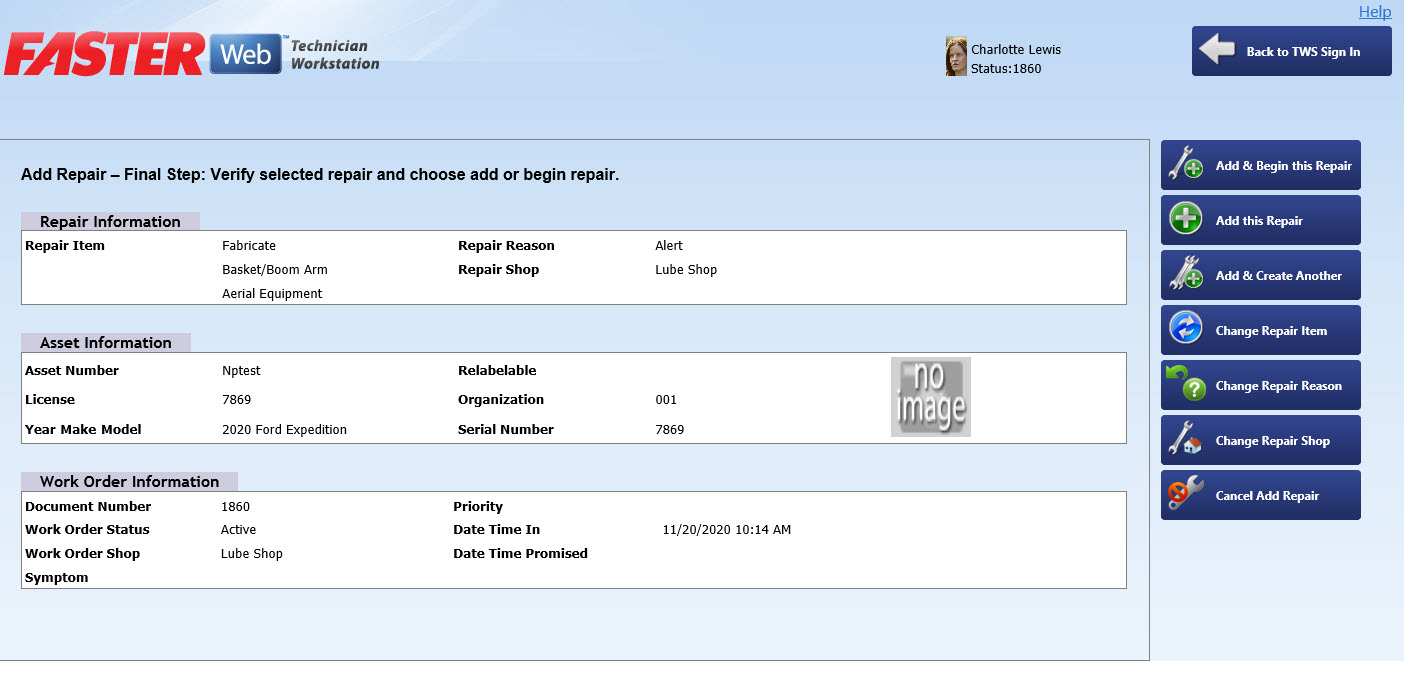
Add Repair - Final Step: Verify selected repair and choose add or begin repair
- Verify that the information displayed is correct.
Note: In the Asset Information section, the VIN/Serial Number field label name is the display label name that is set in FASTER Web > Setup > Application Setup > Assets Fields > VIN/Serial Number.
- If the information is correct, click the Add and Begin this Repair, Add this Repair, or Add & Create Another buttons.
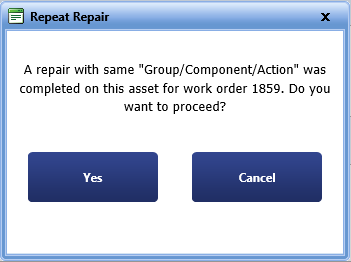
- If the repair that is being added has been already performed within the specified number of days on the work order, then the system displays a pop-up message indicating of a repeat repair. On the pop-up you can perform any of the following:
- Click Yes to proceed.
- Click Cancel to disregard the pop-up message.
|
Note:
- The system begins calculating your time and applying it to the repair as soon as you click on the Add and Begin this Repair button.
-
You can add a new repair to a work order, but can begin working on the new repair of the work order, only if the spending limit for that work order is not exceeded.
-
Only after the spending limit for the work order is approved, you can add a new repair.
|
- If you need to make corrections, click the Change Repair Item, Change Repair Reason, or Change Repair Shop buttons.
- To cancel the addition, click the Cancel Add Repair button.
Related Topics