Tip
TipUsing the Mass Update Assets, you can update the value of an asset field for a group of asset records at once.
Tip
To view the Mass Update Assets page, click the Mass Update link.
To perform mass update of an asset field value
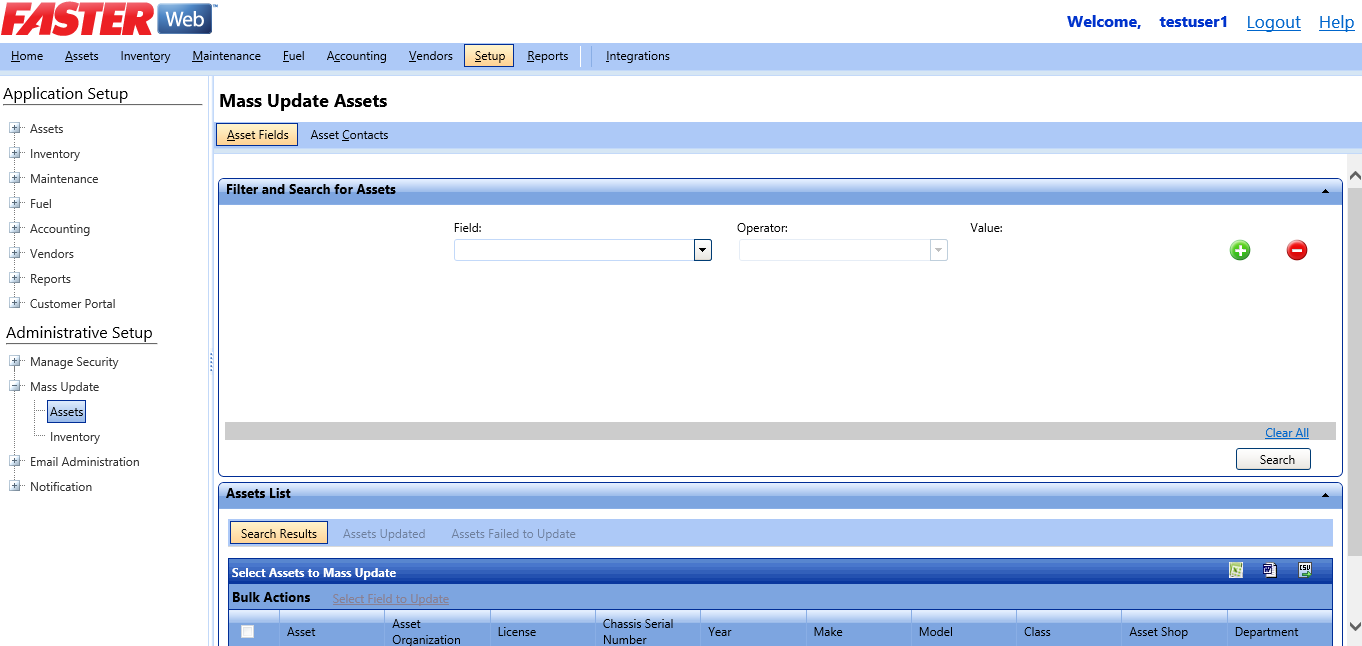
§ Click  next to the Mass Update option, and then click Assets.
The Mass Update for Assets page opens.
In the Mass Update for Assets page, you can update the following:
To perform mass update of an asset field value:
1. In the Filter and Search for Assets section, from the Field list, select an asset field. The Operator and Value fields are enabled. Now, select Operator and Value, and then click Search.
|
Note: You can also perform an advanced search of asset records by creating more filters. To create a filter, add an asset field and its value with an operator. · To add a filter, click · To remove a filter, click · To remove all the filters and search results, click Clear All |
2. The Assets from the search result are displayed in the Assets List section. The Search Results tab is enabled, by default. Select multiple assets that are to be updated, and then click Select Field to Update.
The Update Asset Field page opens.
3. In the Asset Field, select the asset field. The Current Value and New Value fields are enabled.
4. Enter the current and new values and then click Save & Mass Update.
The updated assets are listed in the Assets Updated tab and assets that are not updated are listed in the Assets Failed to Update tab.
Note: To export the search results to a spreadsheet, word document, or CSV file, click the appropriate export link on the upper-right corner of the search results grid.
You can export the Search Results grid in the following formats:
· Microsoft Excel (.xlsx)
· Microsoft Word (.docx)
· Comma-Separated Values (.csv)
1. Click the Microsoft Excel ( ![]() ), Microsoft Word (
), Microsoft Word (  ), or Comma-Separate Value (
  ) icon in the upper-right corner of the Search Results grid.
The File Download dialog box opens prompting you to Open, Save, or Cancel.
2. Click Save.
The Save As dialog box is displayed with the File Type of the selected format.
3. Browse to the desired location, specify a file name, and then click Save.
The Search Results grid is saved in the specified format at the specified location.
The new value is updated for all the selected assets.
To perform mass add/update of an asset contacts:
1. In the Filter and Search for Assets section, from the Field list, select an asset field. The Operator and Value fields are enabled. Select Operator and Value, and then click Search.
|
Note: You can also perform an advanced search of asset records by creating more filters. To create a filter, add an asset contact and its value with an operator. · To add a filter, click · To remove a filter, click · To remove all the filters and search results, click Clear All |
2. The Assets from the search result are displayed in the Assets List section. The Search Results tab is enabled, by default. Select multiple assets that are to be updated, and then click Add/Update Asset Contact.
The Add/Update Asset Field page opens.
3. In the Enter the Person’s Name to be added to the selected Asset(s):, enter the name or click Search.
The Persons page opens.
4. Select a person name from the Persons window. The selected name of the person is displayed in the Enter the Person’s Name to be added to the selected Asset(s): field.
5. Select the role to be changed from the Available Role(s) section to the Selected Role(s) section. Select the Start Date, End Date, Receive Email Notifications, Receive Text Message Notifications (selecting these fields is optional), and then click Save & Mass Add/Update.
The updated assets are listed in the Assets Updated tab and assets that are not updated are listed in Assets Failed to Update tab.
Note: To export the search results to a spreadsheet, word document, or CSV file, click the appropriate export link on the upper-right corner of the search results grid.
You can export the Search Results grid in the following formats:
· Microsoft Excel (.xlsx)
· Microsoft Word (.docx)
· Comma-Separated Values (.csv)
1. Click the Microsoft Excel ( ![]() ), Microsoft Word ( ), or Comma-Separate Value ( ) icon in the upper-right corner of the Search Results grid.
), Microsoft Word ( ), or Comma-Separate Value ( ) icon in the upper-right corner of the Search Results grid.
The File Download dialog box opens prompting you to Open, Save, or Cancel.
2. Click Save.
The Save As dialog box is displayed with the File Type of the selected format.
3. Browse to the desired location, specify a file name, and then click Save.
The Search Results grid is saved in the specified format at the specified location.
The new value is added/updated for all the selected assets.
|
Note: The Mass Add/Update Contact feature allows you to add the same Contact multiple times to the same asset. This allows you to manage the Contact, if they were responsible for the asset for different time ranges in the past. |
The Mass Update for Asset Contacts feature will perform one of two operations:
- ADD a new Asset Contact when NO matching Name and Start Date are found.
- UPDATE an Asset Contact when a matching Name and Start Date are found.
Following are the scenarios for Add and Update of Asset Contact:
· Add Scenario: If you add a person that does not exist on the asset contact list, then it will be added as a new asset contact.
§ Select 'Person-A' and keep remaining fields blank. It will add the person as a new contact.
§ Select 'Person-B' and select start date. It will add the person as a new contact.
· Update Scenario: If you add a person and a start date that already exists in the asset contact, then it will be updated in the existing contact fields.
§ Select 'Person-A' , keep start date blank and update remaining fields (role selections, email notifications, and text notifications). It will update the existing contact fields.
§ Select 'Person-B', select same start date as existing contact and update remaining fields (role selections, email notifications, and text notifications). It will update the existing contact fields.