Managing Attachments
The attachments are the files that you may want to provide to other stakeholders in a workflow. The other stakeholders can then view the attachments and refer to the attachments while performing their tasks.
On the Attachments tab, you can view attachments, add a new attachment, or modify or delete previously added attachments.
Note: A clip or attachment  icon in the Attachments tab indicate that an attachment is added to the item record.
To view an attachment
- Search and view a vendor that you want to edit.
- Click the Attachments tab.
- Click the file icon in grid view or the Open button in thumbnail view for the attachment you want to view.
The attachment downloads on your computer and depending on your browser preference, automatically open in the appropriate application or image viewer.
If the attachment does not open automatically, browse to the location where it is downloaded and double-click to open and view the attachment.
In the Attachments tab, you can attach multiple files of specific formats to a record.
 Tip
Tip
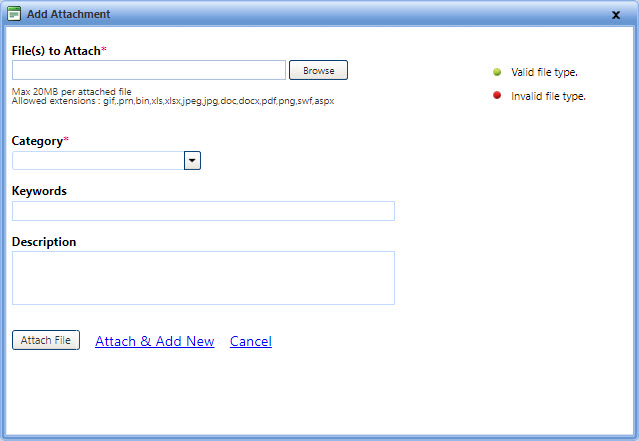
To view the Add Attachments dialog box , click the Add Attachment link.
Steps to view an attachment
- Search for and view the appropriate record.
- Click the Attachments tab.
Note: A clip or attachment  icon in the Attachments tab indicate that an attachment is added to the vendor record.
- Click the file icon (Grid View) or the Open button (Thumbnail View) for the attachment you want to view.
The attachment will download and, depending on your browser preferences, may automatically open in the appropriate application or viewer on your computer.
Note: If the attachment does not automatically open, browse to the location where it downloaded and double-click to open and view it.
Steps to add a new attachment
- Search for and view the appropriate record.
- Click the Attachments tab.
- Click the Add New Attachment link located above the display area, which will open the Add Attachment dialog box.
- Click the Browse button and navigate to the location of the file you want to attach on your computer and click Open.
This step can be repeated for any additional s that you want to attach using the same Category, Keywords and/or Description information.
- Select the attachment category from the Category drop-down list.
- Enter any optional Keywords you like that might help find the attachment in future when filtering.
- Enter an optional Description of the file.
- Click one of the following:
- Attach File to save the information and close the dialog.
- Attach & Add New to attach the file and continue to attaching additional files.
- Cancel to disregard any changes and close the dialog.
Note: After you add an attachment to a vendor record, the clip or attachment icon is displayed in the Attachments tab.
Steps to edit an attachment
- Search for and view the appropriate record.
- Click the Attachments tab.
Note: After you add an attachment to a vendor record, the clip or attachment icon is displayed in the Attachments tab.
- Click the Edit link (Grid View) or Edit button (Thumbnail View) for the attachment you want to edit, which will open the Edit Attachment dialog box.
- To replace the attached file with a different file, click the Replace button and navigate to the location of the file you want to replace with on your computer and click Open.
- To update the details of the attached file, edit update the Category, Keywords or Description as desired.
- Click one of the following:
- Save to save your changes.
- Cancel to disregard any changes and close the dialog box.
Steps to delete an attachment
- Search for and view the appropriate record.
- Click the Attachments tab.
Note: After you add an attachment to a vendor record, the clip or attachment icon is displayed in the Attachments tab.
- Click the Edit link (Grid View) or Edit button (Thumbnail View) for the attachment you want to edit, which will open the Edit Attachment dialog box.
- Click the Delete link.
- In the next dialog box, click one of the following:
- Yes, Delete Attachment to confirm the deletion.
- Cancel to disregard any changes and close the window.
Related Topics
Top of Page